

No products
To be determined
Shipping
0,00€
Total
Product successfully added to your shopping cart
Quantity
Total
There are 0 items in your cart.
There is 1 item in your cart.
Total products
Total shipping
To be determined
Total
Forming place for dental implant
General principles
The purpose of this phase is to reduce bone tissue by maximum possible way according to the implant surface, providing primary implant stability micro motion preventing and reducing the risk of integration failure. One should avoid overheat that cause the osteocytes death, using sharp tools, equipment intermittent preparation drills and abundant irrigation with saline. Drills application technique is extremely important, especially when working in very dense bone tissue, for example the seam area of the mandible.
Equipment for implantation preparation
Most installation systems have a different speed and torque, but they do not have specific differences in the device. Osteotomy is usually carried out at 2000 rpm . /min to avoid overheating. Bed preparation and subsequent introduction of the implant osteotomy or cutting is performed at a speed of 25 vol./min with the restriction tork to 40 N/cm depending on the bone density.
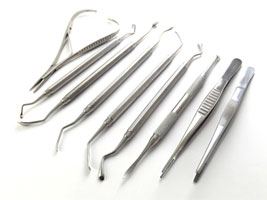
Basic tools: surgical wipes, dental surgical hoses, dental probe, dental mirror, scalpel, needle holders and suture, various retractors, gauze
The submission of physiological cooling can be implemented as by filing internal and external; both options together are also possible.
Consistency in the use of drills
After tilting flap mounted surgical template. Sterile surgical pencil should note the location of the implant in the bone tissue is then formed primary bed using a small spherical boron
Irrigation: external and internal. Targets of irrigation:
• Preventing working part of the tool overheating, and therefore, bone overheating;
• Constantly wash bone chips and clean the working part of drills.
Manufacturers produce a variety of drills systems with external or internal cooling supply (or two options at the same time). Both systems used properly provide good cooling of the surgical field. In most implant systems range includes drills that allow for a gradual increase in bone bed, ensuring correct orientation of the implant and prevent overheating as well as excessive preparation of the bone bed. Drills may vary in length, diameter according the implant size. As a rule a diameter of the last drill is slightly less than the implant diameter. This provides a good primary stability upon installation. In very dense bone can be pre- sliced for easy implant insertion. Accelerated introduction of the implant To the narrow bed can cause overheating, partial immersion of the implant and bone fracture. To improve primary stability if possible, the implant should be placed between the cortical bones. This is usually achieved in the apical and coronal areas, but you can use the buccal and lingual plates. In cases where the work is carried out over the lower alveolar first, the use of lower field mandible is highly risky. The upper jaw may be used bicortical principle of stability using the bottom of the sinuses and nasal cavity. Note that only the apical portion of the implant can be fixed to the cortical plate.
Ready-made kits for surgical protocol:


